Sniper's Edge Hockey Shooting Tarp Installation Instructions

When Installing Inside a Garage/Building or in a Basement
The Sniper's Edge can be hung from any ceiling; in the garage, in a basement or any other room/building. This is one of the most common types of installations and is very straight forward and simple.
STEP 1) Attach the top of the tarp using the metal grommets to a standard 2x4 that is as long as the width you want to install the tarp to. The width of the Sniper's Edge is 16 feet, but it can be installed to a width less than that if you would like. In this case, you would use a 2x4 of a length equal to the width you want to install the Sniper's Edge to.
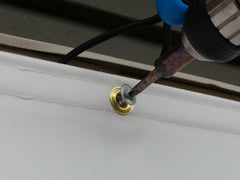
STEP 2) Once you have the 2x4, align and attach the top of the tarp to the 4 inch side of the 2x4 using the 9 metal grommets on the tarp and 9 wood screws and washers. One inch screws work fine. When attaching the tarp, don't forget to capture the included bungee ball cords between the tarp and the 2x4 on the 2nd, 4th, 6th and 8th grommets starting from the left.
STEP 3) Next use three eye or hook screws. One at each end of the 2x4 and one in the middle of the 2x4, in the 2 inch side, you will screw in an eye/hook screw. When the tarp is hanging the eye/hook screws will be pointing up towards the ceiling.
STEP 4) The final step is to use the eye/hook screws to hang the 2x4 from the ceiling. Again use either an eye/hook screw in three places in the ceiling/joists.
If installing in front of a wall, the shooting tarp should be installed so that it is approximately 12" from the wall.
Then use 3 sections of rope, cable or chain to hang the 2x4 from the ceiling. You do not need to use very heavy rope, chain or cable as the total weight of the tarp is only 23 pounds plus about another 20 pounds for the 2x4.
NOTE: The Sniper's Edge Shooting Tarp should be installed at a height so that the bottom of the tarp touches the ground and even comes back toward the shooter about 1-2 inches. Another way to be sure of proper install height is to have the top of the goal cross bar be at about the regulation, 4 feet from the ground.
When Installing Over the Garage Door Opening
STEP 1) Align and attach the top of the tarp to the top trim board/frame over the garage door opening using the 9 metal grommets at the top of the tarp and standard screws and washers. One inch screws work fine.
STEP 2) When attaching the tarp, don't forget to capture the included bungee ball cords between the tarp and the trim board/frame of the garage on the 2nd, 4th, 6th and 8th grommets starting from the left. (see picture below)
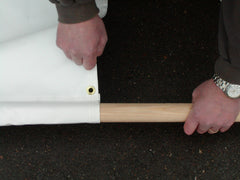
STEP 3) Once the tarp is installed (either in the garage or over the garage door opening) a standard 16’ wooden closet dowel can be inserted into the bottom sleeve of the tarp. This dowel will help to keep pucks from going underneath and makes it easier to roll the tarp up when not in use, if preferred.


